Technotes
The table below lists the tech notes published by Metric Halo. These notes are in-depth looks at subjects of interest to the users of our products. Please check back here often as this library will grow with time. To access a particular note, click the tech note number in the table — the note number is linked to the html version of the tech note.
Information on our legacy (non-2d Expanded) products can be found on our Legacy Technotes Page.
| Technote # |
Title |
Focus |
Author |
Version |
Date |
| 0002 |
Using the MIO with Windows Programs |
MIO |
B.J. Buchalter |
1.1 |
June 02, 2007 |
| 0003 |
Multizone Measurement with SpectraFoo |
SpectraFoo |
Allen Rowand |
1.2 |
July 2, 2010 |
| 0007 |
Creating Mono Outputs In Logic |
Logic before v.9 |
Dennis Gunn & AR |
1.0 |
March 31, 2008 |
| 0008 |
MIO 2d Expanded & Pro Tools |
Pro Tools before v.9 |
AR & MS |
1.0 |
October 19, 2009 |
| 0009 |
Routing into SpectraFoo from your DAW |
MIO 2d Expanded |
Allen Rowand |
1.0 |
December 10, 2009 |
| 0010 |
Demystifying Firewire and Interfaces |
All |
Allen Rowand & B.J. Buchalter |
1.0 |
April 16, 2010 |
| 0011 |
MIO Console & Pro Tools v.9 |
MIO 2d Expanded |
Allen Rowand |
1.2 |
September 8, 2011
|
Tutorial Videos
The tables below list the tutorial videos published by Metric Halo. These movies provide in-depth tutorials to help you understand and make the most of our products.
- To view a video, click the title to open a YouTube viewer or right-click to open the movie in a new tab/window.
- You may also right-click the “Download” link to save an mp4 version to view from your computer directly.
Videos for our legacy products can found on our Legacy Technotes Page.
MIO Console v5
| Title |
Download |
Description |
Author |
Version |
Date |
| v.5 Mixer Overview |
Download |
An overview of the v5 Mixer |
Metric Halo |
1.0 |
May 28, 2008 |
| Templates |
Download |
Using factory templates to get started in MIOConsole |
Metric Halo |
1.0 |
May 28, 2008 |
| FireWire Routing |
Download |
Routing over DAW and FW channels between the MIO and your Mac |
Metric Halo |
1.0 |
May 28, 2008 |
| Simple Input |
Download |
How to route inputs from your MIO to your DAW |
Metric Halo |
1.0 |
May 28, 2008 |
| Simple Output |
Download |
How to get sound from your DAW to the MIO |
Metric Halo |
1.0 |
May 28, 2008 |
| Manual Mixer Configuration |
Download |
How to build a mixer from scratch |
Metric Halo |
1.0 |
May 28, 2008 |
| Monitor Controller |
Download |
How to use v5's Monitor Controller to… control your monitors |
Metric Halo |
1.0 |
May 28, 2008 |
| Simple FireWire Returns |
Download |
How to simply route audio from other programs into SpectraFoo |
Metric Halo |
1.0 |
May 28, 2008 |
| Sends |
Download |
Using sends in MIOConsole for more flexible analysis in SpectraFoo |
Metric Halo |
1.0 |
May 28, 2008 |
| FW Returns and ConsoleConnect |
Download |
Harness the power of FireWire Returns and ConsoleConnect in your DAW sessions |
Metric Halo |
1.0 |
May 28, 2008 |
| Surround |
Download |
Using v5's powerful surround mixing facilities |
Metric Halo |
1.0 |
May 28, 2008 |
| v5 Record Panel |
Download |
v5's flexible Record Panel; the multitrack recorder in your MIO |
Metric Halo |
1.0 |
May 28, 2008 |
| Legacy Boxes |
Download |
How to use non-2d Expanded boxes with v5 |
Metric Halo |
1.0 |
May 28, 2008 |
| Hardware Remap |
Download |
How the MIOConsole handles mapping Console documents to interfaces |
Metric Halo |
1.0 |
May 28, 2008 |
| The I/O Insert |
Download |
An introduction to the I/O insert in v5.6, with DAW demos |
Metric Halo |
1.0 |
July 31, 2013 |
| Introduction to ConsoleSync, Part 1 |
Download |
An introduction to ConsoleSync, introduced in v5.6 |
Metric Halo |
1.0 |
August 13, 2013 |
| Introduction to ConsoleSync, Part 2 |
Download |
An overview of ConsoleSync's preferences |
Metric Halo |
1.0 |
August 29, 2013 |
| Install 2d in 2882 |
– |
How to install the 2d card in your 2882 |
Metric Halo |
1.0 |
May 28, 2008 |
| Install 2d in ULN-2 |
– |
How to install the 2d card in your ULN-2 |
Metric Halo |
1.0 |
May 28, 2008 |
+DSP
SpectraFoo
General
| Configuring Shuttle Express |
Download |
Tutorial for using the Shuttle Express with the Monitor Controller |
Allen Rowand |
1.0 |
September 17, 2008 |
| Recording Performances With Mainstage, Logic and v.5 |
Download |
Routing and processing Mainstage into Logic using MIO v.5 |
Allen Rowand |
1.0 |
February 19, 2009 |
| Multibox Mixing and Monitoring with v.5 |
Download |
Configuring monitor mixes and effect sends across multiple boxes with v.5 |
Allen Rowand |
1.0 |
February 19, 2009 |
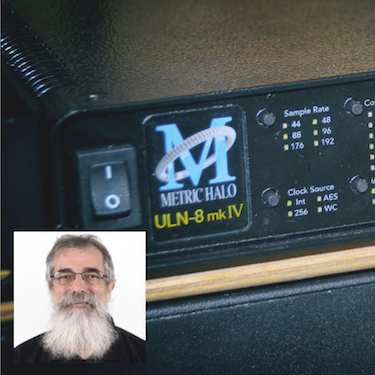
Introducing the ULN-8
Part 1 |
Download |
An introduction to the features and capabilities of the ULN-8 |
Allen Rowand |
1.0 |
March 8, 2010 |
Introducing the ULN-8
Part 2 |
Download |
An introduction to the features and capabilities of the ULN-8 |
Allen Rowand |
1.0 |
March 8, 2010 |
MIO Console & Pro Tools v9
Part 1 |
Download |
An introduction to using Metric Halo interfaces with PT9 |
Allen Rowand |
1.0 |
December 14, 2010 |
MIO Console & Pro Tools v9
Part 2 |
Download |
Using aggregate devices and MIO summing with PT9 |
Allen Rowand |
1.0 |
December 14, 2010 |
| MIO Console's I/O Insert & Logic |
Download |
A quick look at Pro using the I/O insert with Logic |
Allen Rowand |
1.0 |
August 1, 2013 |
| MIO Console's I/O Insert & Pro Tools |
Download |
A quick look at using the I/O insert with Pro Tools |
Allen Rowand |
1.0 |
August 1, 2013 |
Stories From the Road
Allen Rowand, Metric Halo’s Field Operative worked as the advance engineer for the Wicked 1st National Tour. In this capacity, Allen travelled to a new city every few weeks, loaded in a full Broadway live theater sound reinforcement system, and tuned the system for each venue. Of course, he used SpectraFoo and Mobile I/O to pull off this massive undertaking. Using SpectraFoo’s multi-channel analysis functions, coupled with the 2882 as a multichannel analysis preamp, processor and switcher allowed the tour to do detailed analysis and tuning across multiple zones in a fraction of the time possible with other systems. Each load-in and venue posed their own challenges, and Allen has taken the time to write about these challenges and solutions. Here are the Stories from the Road chronicling the loadins and the ways that 'Foo made the show better in every venue.
| Episode |
Venue |
Description |
| 1 |
Intro |
Intro |
| 2 |
Back In the Shop |
Copy A Channel |
| 3 |
Cincinnati |
The Case of the Hanging Bass |
| 4 |
Toronto |
Replay That Funky Music |
| 5 |
Cleveland |
Wait Just a .52ms |
| 6 |
Ft. Lauderdale |
Not Much To Say |
| 7 |
Buffalo |
Make This Sound Like That |
| 8 |
East Lansing |
You can always go back... |
| 9 |
Pittsburgh |
It’s better to sound good than to look good.. |
| 10 |
Atlanta |
Too much, too fast, too fun! |
| 11 |
Minneapolis |
You Better Carry That Weight(ing) |
| 12 |
Louisville |
New Year, New Rig |
|